After more than a decade of staining cedar in Central Otago's harsh alpine climate, I've learned exactly what keeps cedar looking beautiful and what destroys it. This guide covers everything: how often to wash and stain, the products I trust, and the methods that separate cedar that lasts 20+ years from cedar that fails in 5.
Need professional cedar staining? View our cedar staining services or call for a free quote.
Cedar is one of the most rewarding timbers to work with. It's naturally rot-resistant, dimensionally stable, and ages beautifully - if you understand how to care for it. Get it wrong, and you're looking at silvered, checked, splitting boards that cost a fortune to restore.
Understanding Cedar: Why Maintenance Matters
Cedar contains natural oils (thujaplicins) that make it resistant to rot and insects. But here's what most people don't realise: UV light breaks down these oils. Once they're depleted, cedar loses its protection and deteriorates rapidly.
The silver-grey colour people associate with "weathered cedar" isn't a patina - it's damage. That grey layer is dead wood fibre (called lignin degradation), and it prevents stains from penetrating and bonding properly.
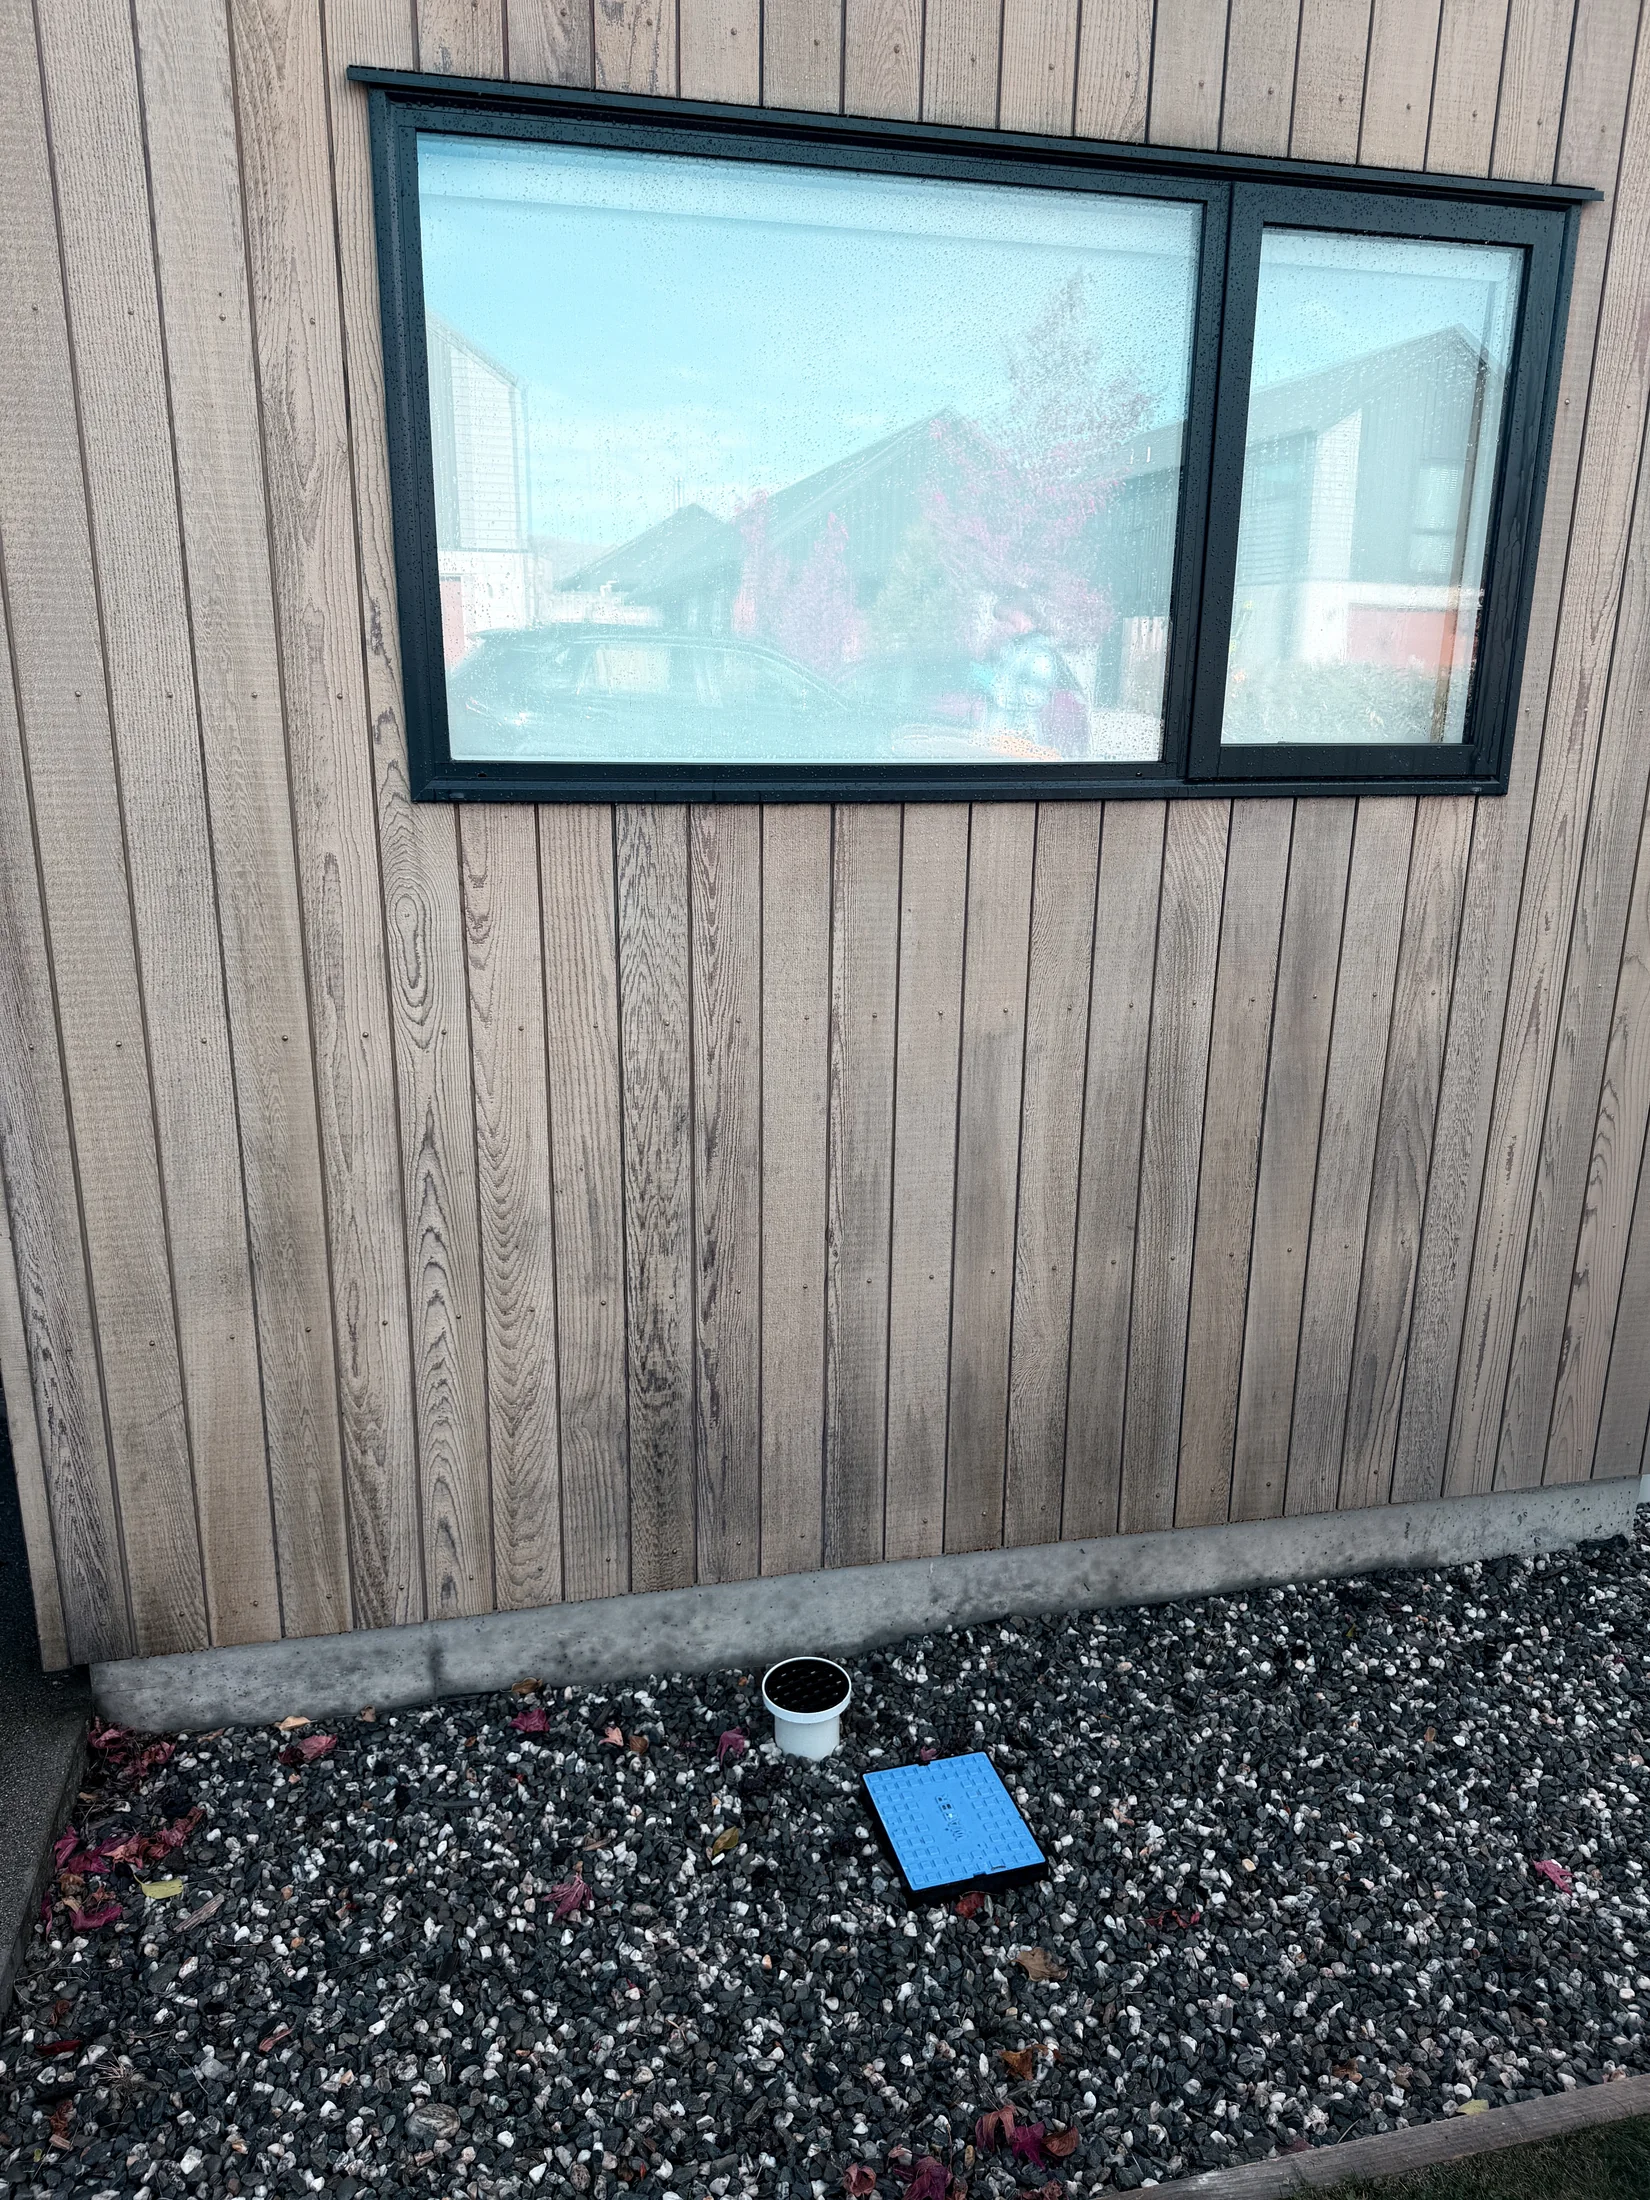 This is what depleted oils look like: dry, washed-out boards with grey starting along the grain. This Northlake home was caught early enough for a wash and oil refresh - no sanding back required.
The goal of cedar maintenance is simple: keep UV blockers on the surface before the sun breaks down the natural oils underneath.
The Maintenance Schedule That Actually Works
After years of tracking how cedar performs across different elevations and exposures, here's the schedule I recommend:
Washing Schedule
| Exposure | Wash Frequency | Why |
|---|---|---|
| North-facing (full sun) | Every 6 months | Pollen, dust and pollution accumulate faster; washing prevents staining and mould |
| East/West-facing | Annually | Moderate exposure needs yearly attention |
| South-facing (shaded) | Annually | More prone to mould/algae; less UV but more moisture |
| Under eaves/sheltered | Every 12-18 months | Less exposure but can trap moisture |
Staining Schedule
| Condition | Re-stain Interval | Notes |
|---|---|---|
| Full sun (north/west faces) | Every 2-3 years | UV degrades stain faster; don't wait for failure |
| Moderate exposure | Every 3-4 years | Standard maintenance cycle |
| Sheltered/south faces | Every 4-5 years | Can go longer but inspect annually |
| Coastal or high-altitude | Every 2 years | Salt spray and intense UV accelerate breakdown |
 Why the schedule differs by wall: at Wanaka's latitude the midday sun is always due north, so north and west faces take the brunt of the UV while south faces stay shaded and damp.
The critical insight: Don't wait until your cedar looks bad to re-stain. By then, you've lost the protection and may need to sand back to fresh wood. Re-stain while there's still colour - it's faster, cheaper, and the new coat bonds better.
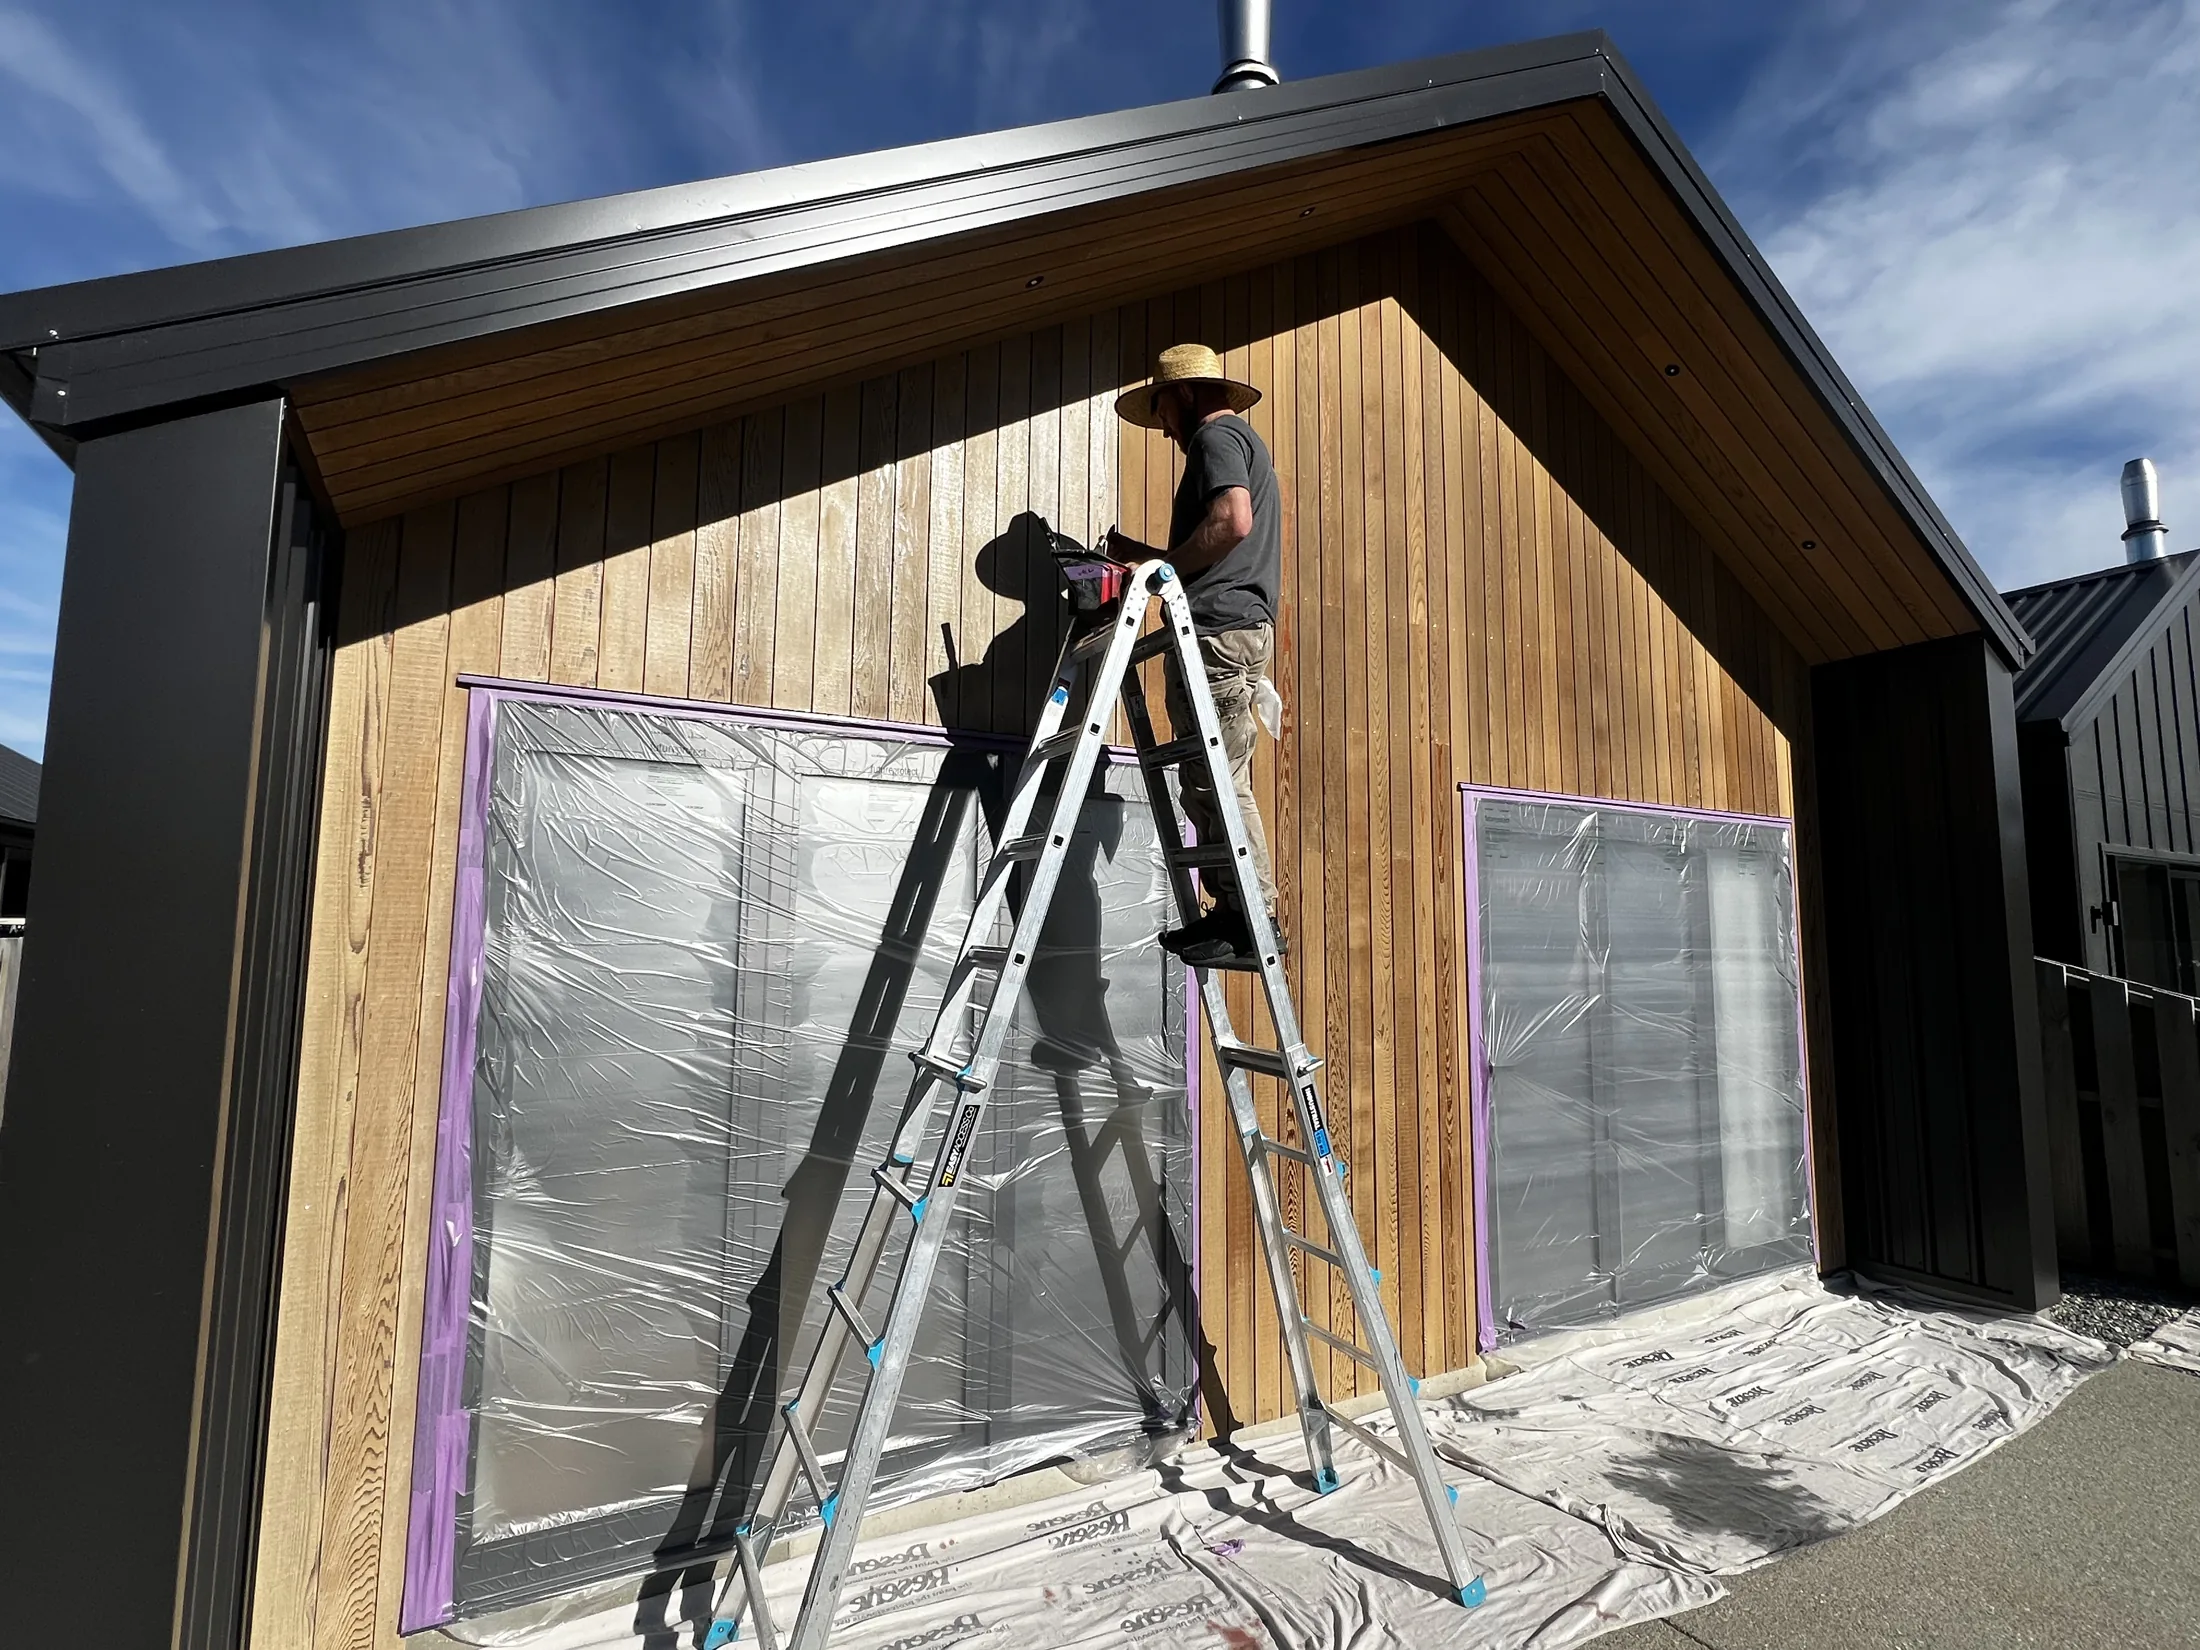
How to Wash Cedar Properly
Washing cedar isn't just hosing it down. Done wrong, you'll damage the wood or drive moisture into the grain. Here's my method:
What You'll Need
- Garden hose with spray nozzle (or pressure washer set to maximum 1,200 PSI)
- Soft-bristle brush or broom
- Garden pressure sprayer (pump bottle) for applying the cleaning solution
- Timber cleaning solution (see product recommendations below)
- Safety glasses and gloves
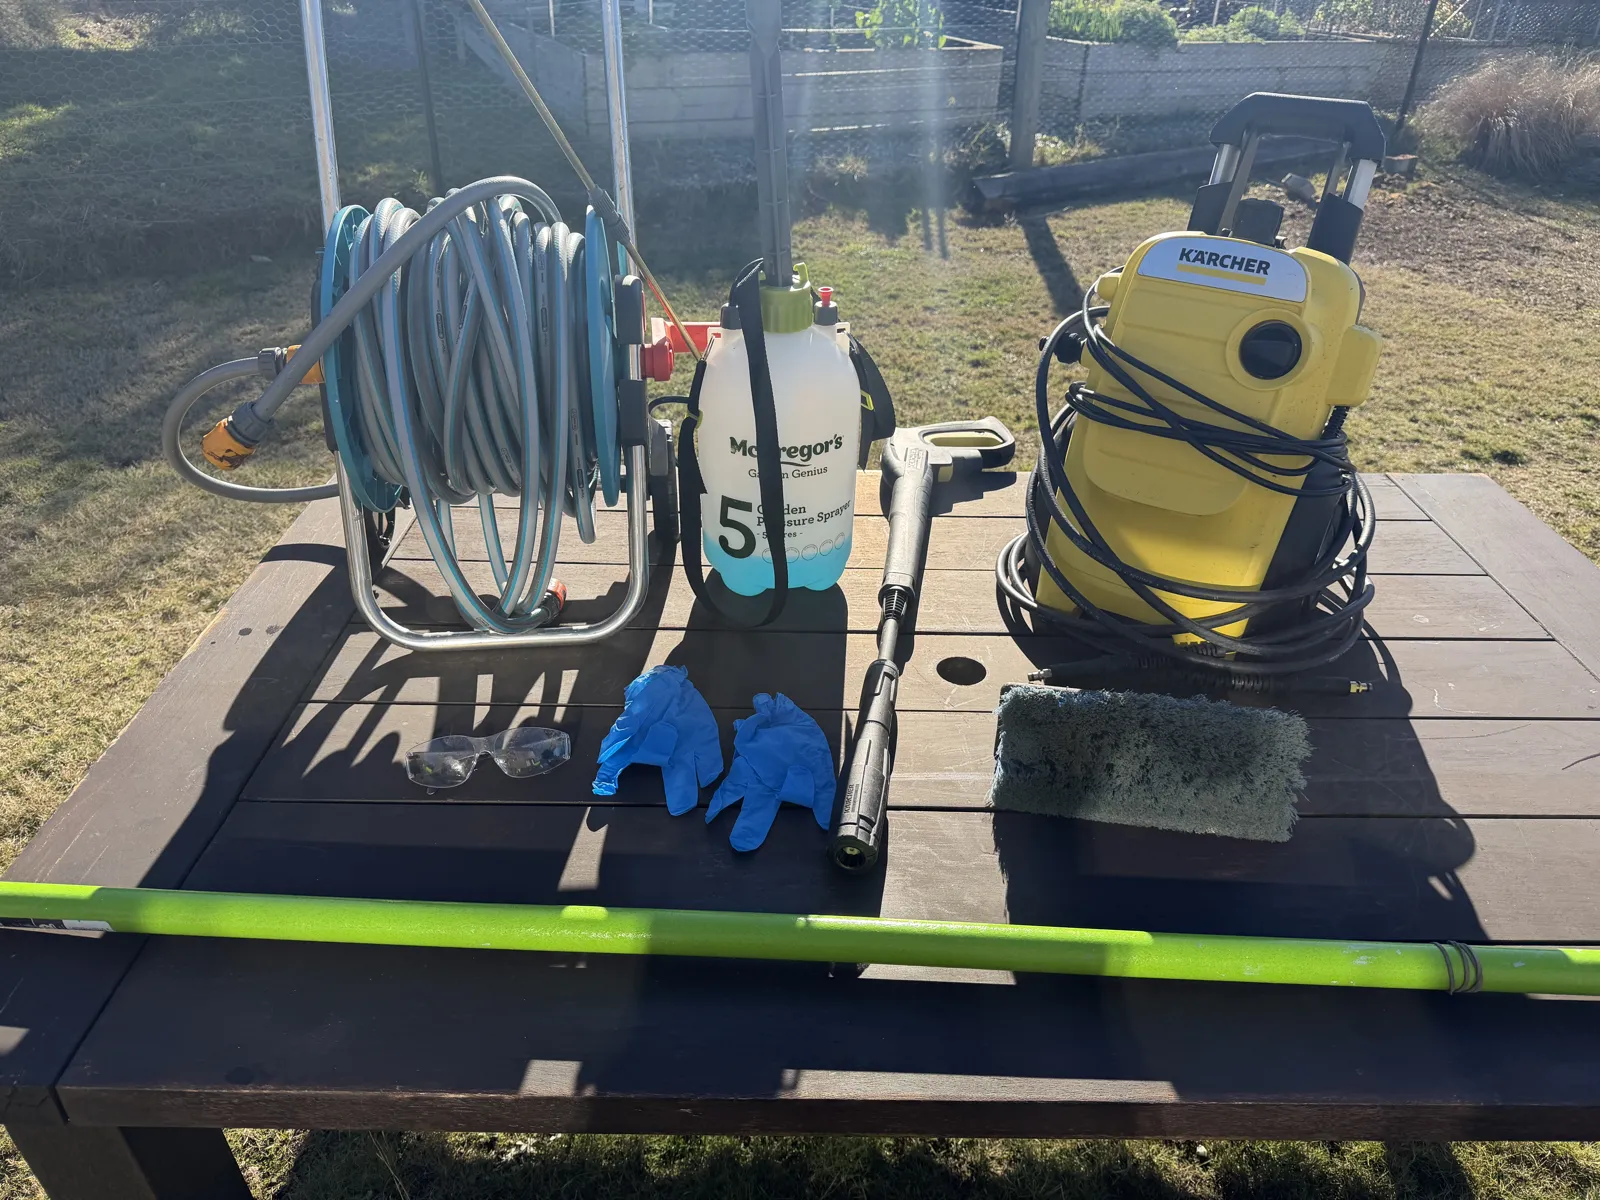 My actual washing kit. Nothing fancy - a garden hose, a $30 pump sprayer for the cleaning solution, a soft brush on a pole, and a domestic pressure washer kept on its gentlest setting.
Step-by-Step Washing Process
1. Pre-wet the surface
Start at the bottom and work up. This prevents dirty water from running down onto dry timber and causing streaks. Use plain water and thoroughly wet all surfaces.
2. Apply cleaning solution
Mix your timber cleaner according to directions. Apply with a pump sprayer or brush, working in manageable sections (about 3-4 square metres at a time). Let it dwell for 5-10 minutes - don't let it dry.
3. Agitate gently
Use a soft-bristle brush to work the cleaner into the grain. Always brush with the grain, never across it. This lifts dirt, mould spores, and oxidised surface fibres.
4. Rinse thoroughly
Rinse from top to bottom with clean water. If using a pressure washer, keep the nozzle 300-400mm from the surface and use a fan tip (25-40 degree), never a pinpoint. Work with the grain.
5. Allow to dry completely
This is crucial. Cedar must dry to below 18% moisture content before staining. In good conditions, this takes 2-3 dry days. I use a moisture meter to confirm - guessing leads to stain failure.
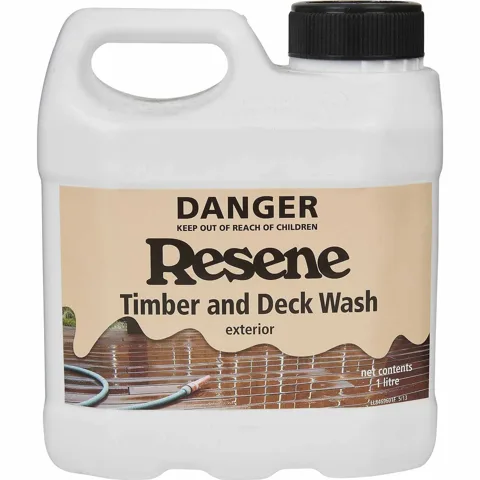
Cleaning Products I Recommend
- Resene Timber and Deck Wash - Excellent all-rounder, biodegradable, safe near gardens. Available at Mitre 10 or your local Resene ColorShop.
- Dryden LiquidTimberClean - Stronger for heavily soiled or mould-affected cedar. Order direct from Dryden or through their stockists.
- Intergrain UltraPrep Timber Cleaner (formerly Reviva) - Good for grey, weathered cedar; helps restore the colour before staining. Available at Bunnings.
- DIY option: Mix of 1 cup oxygen bleach (sodium percarbonate) per 4 litres warm water - effective and timber-safe

Avoid: Chlorine bleach (damages wood fibres and can react with tannins), harsh degreasers, or anything containing sodium hydroxide.
Preparation: The Step Most People Skip
Here's the truth: 80% of stain failures come from poor prep. I've seen expensive stains peel within a year because someone skipped this step. Preparation is everything.
When You Need to Sand
You need to sand if:
- Cedar has turned grey (indicates UV damage to surface fibres)
- Previous stain is flaking, peeling, or patchy
- Grain has raised significantly (feels rough or "furry")
- You're changing from a darker to lighter stain colour
You can skip heavy sanding if:
- Cedar still has good colour and the stain has worn evenly
- Surface accepts water (drips soak in within 30 seconds)
- You're applying a maintenance coat of the same product
My Sanding Method
For weathered/grey cedar:
- Start with 60 or 80-grit paper to cut back the grey layer - you're removing dead wood fibre until you see fresh, honey-coloured cedar
- Switch to 100-grit to smooth out the scratch pattern
- Finish with 120-grit for optimal stain absorption
- Always sand with the grain
For maintenance prep (cedar still has colour):
- Light scuff with 120-grit or maroon scotch-brite pad
- This "keys" the surface for the new coat to bond
Critical: After sanding, remove ALL dust. I use a blower first, then wipe down with a damp cloth or tack rag. Dust contamination causes adhesion failure.
Filling and Repairs
Cedar naturally develops small checks (cracks) - this is normal and usually doesn't need filling. However, fill any checks deeper than 3mm or wider than 2mm with a flexible exterior filler like Selleys Exterior Wood Filler or Sika Sikaflex.
For split or cupped boards, it's often better to replace than repair. Cedar boards are relatively affordable, and a proper replacement blends seamlessly.
Staining: Products, Application & Technique
Understanding Stain Types
Penetrating oils (my go-to for cedar):
These soak into the wood rather than forming a film on top. They're easier to maintain, won't peel, and allow the timber to breathe. The trade-off: they need more frequent recoating.
Film-forming stains:
These create a coating on the surface. They last longer between coats but can peel if moisture gets underneath. Harder to maintain - you often need to sand back completely when they fail.
My recommendation: Penetrating oil-based stains for cedar weatherboards. They're more forgiving, easier to maintain, and look more natural.
Products I Trust (and Why)
After testing dozens of products over the years, these are my top picks:
Dryden WoodOil with Colourtone+
- Best for: Premium jobs where longevity and appearance matter
- Why I like it: Excellent UV blockers, deep penetration, beautiful natural finish. Colourtone+ is the tint you add to the WoodOil - it's what gives the UV protection, so include it in every coat
- Recoat interval: 3-4 years on moderate exposures
- Application: Brush or spray, 2 coats minimum
- Coverage: 8-12m2 per litre depending on timber porosity
- Where to buy: Direct from Dryden or their stockists
Resene Waterborne Woodsman
- Best for: Good value, wide colour range, easy cleanup
- Why I like it: Consistent results, excellent technical support from Resene
- Recoat interval: 2-3 years (waterborne breaks down faster than oil)
- Application: Brush or spray, 2-3 coats
- Coverage: 10-14m2 per litre
- Where to buy: Resene ColorShop online or Mitre 10
Cabot's Deck & Exterior Stain (Oil Based)
- Best for: Decks and high-traffic areas; tougher than standard stains
- Why I like it: Extremely durable, good UV protection, big colour range
- Recoat interval: 3-4 years
- Application: Brush preferred for best penetration
- Coverage: 10-15m2 per litre
- Where to buy: Bunnings
Intergrain NaturalStain (formerly UltraDeck Timber Stain)
- Best for: When you want a more "finished" look with some sheen
- Why I like it: Excellent for feature walls, creates a richer appearance
- Recoat interval: 3-4 years
- Application: Brush or lamb's wool applicator
- Coverage: 12-16m2 per litre
- Where to buy: Bunnings
Budget option: Wattyl Forestwood Traditional Oil Stain
- Best for: Rentals, sheds, or when budget is tight
- Recoat interval: 2 years (less durable than premium products)
- Coverage: 10-14m2 per litre
- Where to buy: Wattyl stockists
Application Technique
Weather conditions:
- Temperature: 10-25 degrees C (ideal is 15-20 degrees C)
- Humidity: Below 85%
- No rain forecast for 24-48 hours
- Avoid direct sunlight on the surface - work with the shade
Method:
- Start at the top, work down
- Maintain a "wet edge" - don't let stain dry before you've finished a board
- Apply liberally, then back-brush to even out and push stain into the grain
- For penetrating oils: wipe off any excess after 15-20 minutes
- Two coats minimum, three coats on north/west faces
- Wait 4-24 hours between coats (check product instructions)
Pro tips:
- Tint your first coat 20% lighter than your final colour - it helps you see coverage and the final coat evens everything out
- Keep a wet rag handy to immediately wipe any drips or runs
- Box your stain (pour multiple cans into one container and mix) to ensure colour consistency
- Always "cut in" edges and corners with a brush, even if spraying the main surface
Troubleshooting Common Problems
Stain won't penetrate
Cause: Surface contamination, insufficient prep, or over-application of previous coats Fix: Sand back to fresh wood with 80-grit, clean thoroughly, re-apply
Blotchy or uneven colour
Cause: Inconsistent sanding, varying timber porosity, or working in direct sun Fix: Light sand with 120-grit, apply a thinned "conditioning" coat first, then full coats
Stain peeling or flaking
Cause: Moisture trapped under film-forming stain, or applied over grey/contaminated cedar Fix: Sand back completely to bare wood, ensure moisture content is below 18%, switch to penetrating oil stain
Mould returning quickly after staining
Cause: Mould spores not killed during prep, or high-moisture environment Fix: Pre-treat with a fungicidal wash (Resene Moss & Mould Killer), ensure good ventilation around timber, consider a stain with added fungicide
Tannin bleed (dark streaks)
Cause: Cedar tannins leaching through stain, especially with lighter colours Fix: Apply a tannin-blocking sealer before staining, or choose a darker stain colour
The Long-Term Care Plan
Here's how I'd manage cedar over its lifetime:
Year 0 (New installation):
- Allow cedar to weather for 2-4 weeks before first stain (lets surface fibres "relax")
- Apply two coats of quality penetrating stain
- Document the product used and date
Year 1:
- Autumn wash with timber cleaner
- Inspect for any missed spots or early wear
- Touch up as needed
Year 2-3:
- Annual autumn wash
- Full maintenance coat on high-exposure faces
- Touch-up coat on sheltered areas
Year 4-5:
- Full re-stain (all surfaces, 2 coats)
- Light prep sand if needed
Year 10+:
- Assess timber condition
- May need more intensive prep if maintenance was inconsistent
- Consider whether a colour change is desired
Following this schedule, well-maintained cedar should last 30+ years without major restoration work.
Climate Considerations for Central Otago
I can't write about cedar without mentioning our local conditions. Wanaka, Queenstown, Cromwell, and the wider Central Otago region are particularly harsh on timber:
- High altitude = intense UV - thinner atmosphere filters less radiation
- Lake reflection - light bounces off the water onto your walls
- Extreme temperature swings - from -10 degrees C winter nights to 35 degrees C summer days
- Low humidity - timber dries out faster, increasing checking
- Strong nor'west winds - accelerate drying and can drive rain into joints
For local conditions, I recommend:
- Stain every 2-3 years rather than 3-4
- Use products with strong UV blockers (Dryden WoodOil with Colourtone+ is excellent)
- Pay extra attention to north and west faces
- Consider a third coat on lake-facing walls
When DIY Makes Sense (and When to Call a Pro)
DIY-appropriate:
- Annual or bi-annual washing
- Touch-up staining on small areas (under 10m2)
- Single-storey, easy-access surfaces
- Maintenance coats on well-prepared cedar
Call a professional:
- Full restoration on weathered/grey cedar (sanding is time-intensive and technique matters)
- Multi-storey work requiring scaffolding or rope access
- Large areas where colour consistency is critical
- If you're unsure about product compatibility with existing finishes
Final Thoughts
Cedar rewards good maintenance. The effort you put into regular washing and timely re-staining pays dividends in appearance, longevity, and avoiding expensive full restorations.
The key principles:
- Wash regularly - remove contaminants before they become stains
- Re-stain before failure - don't wait for bare wood
- Prep properly - this is where success or failure is determined
- Use quality products - the extra cost is always worth it
- Match the schedule to exposure - north faces need more love than south
If your cedar has gotten away on you, or you'd rather leave it to someone who does this every day, I'm happy to assess your home and give you a clear plan. There's something deeply satisfying about bringing weathered cedar back to life - and with the right ongoing care, keeping it that way for decades.
Feel free to reach out for a no-obligation look at your place. I'll give you my honest assessment and recommendations, whether you decide to DIY or have me handle it.