A mate in Luggate ended up with a hole in his wall and had a go at patching it himself. He gave it a decent crack, but without the right technique the compound went on too thick and it wasn't sitting flat. He gave us a call and we came in to sort it out.
It's a really common thing — wall repairs look simple but there are a few tricks to getting them invisible. Here's what we did, step by step.
Step 1: Cut Back to a Clean Rectangle
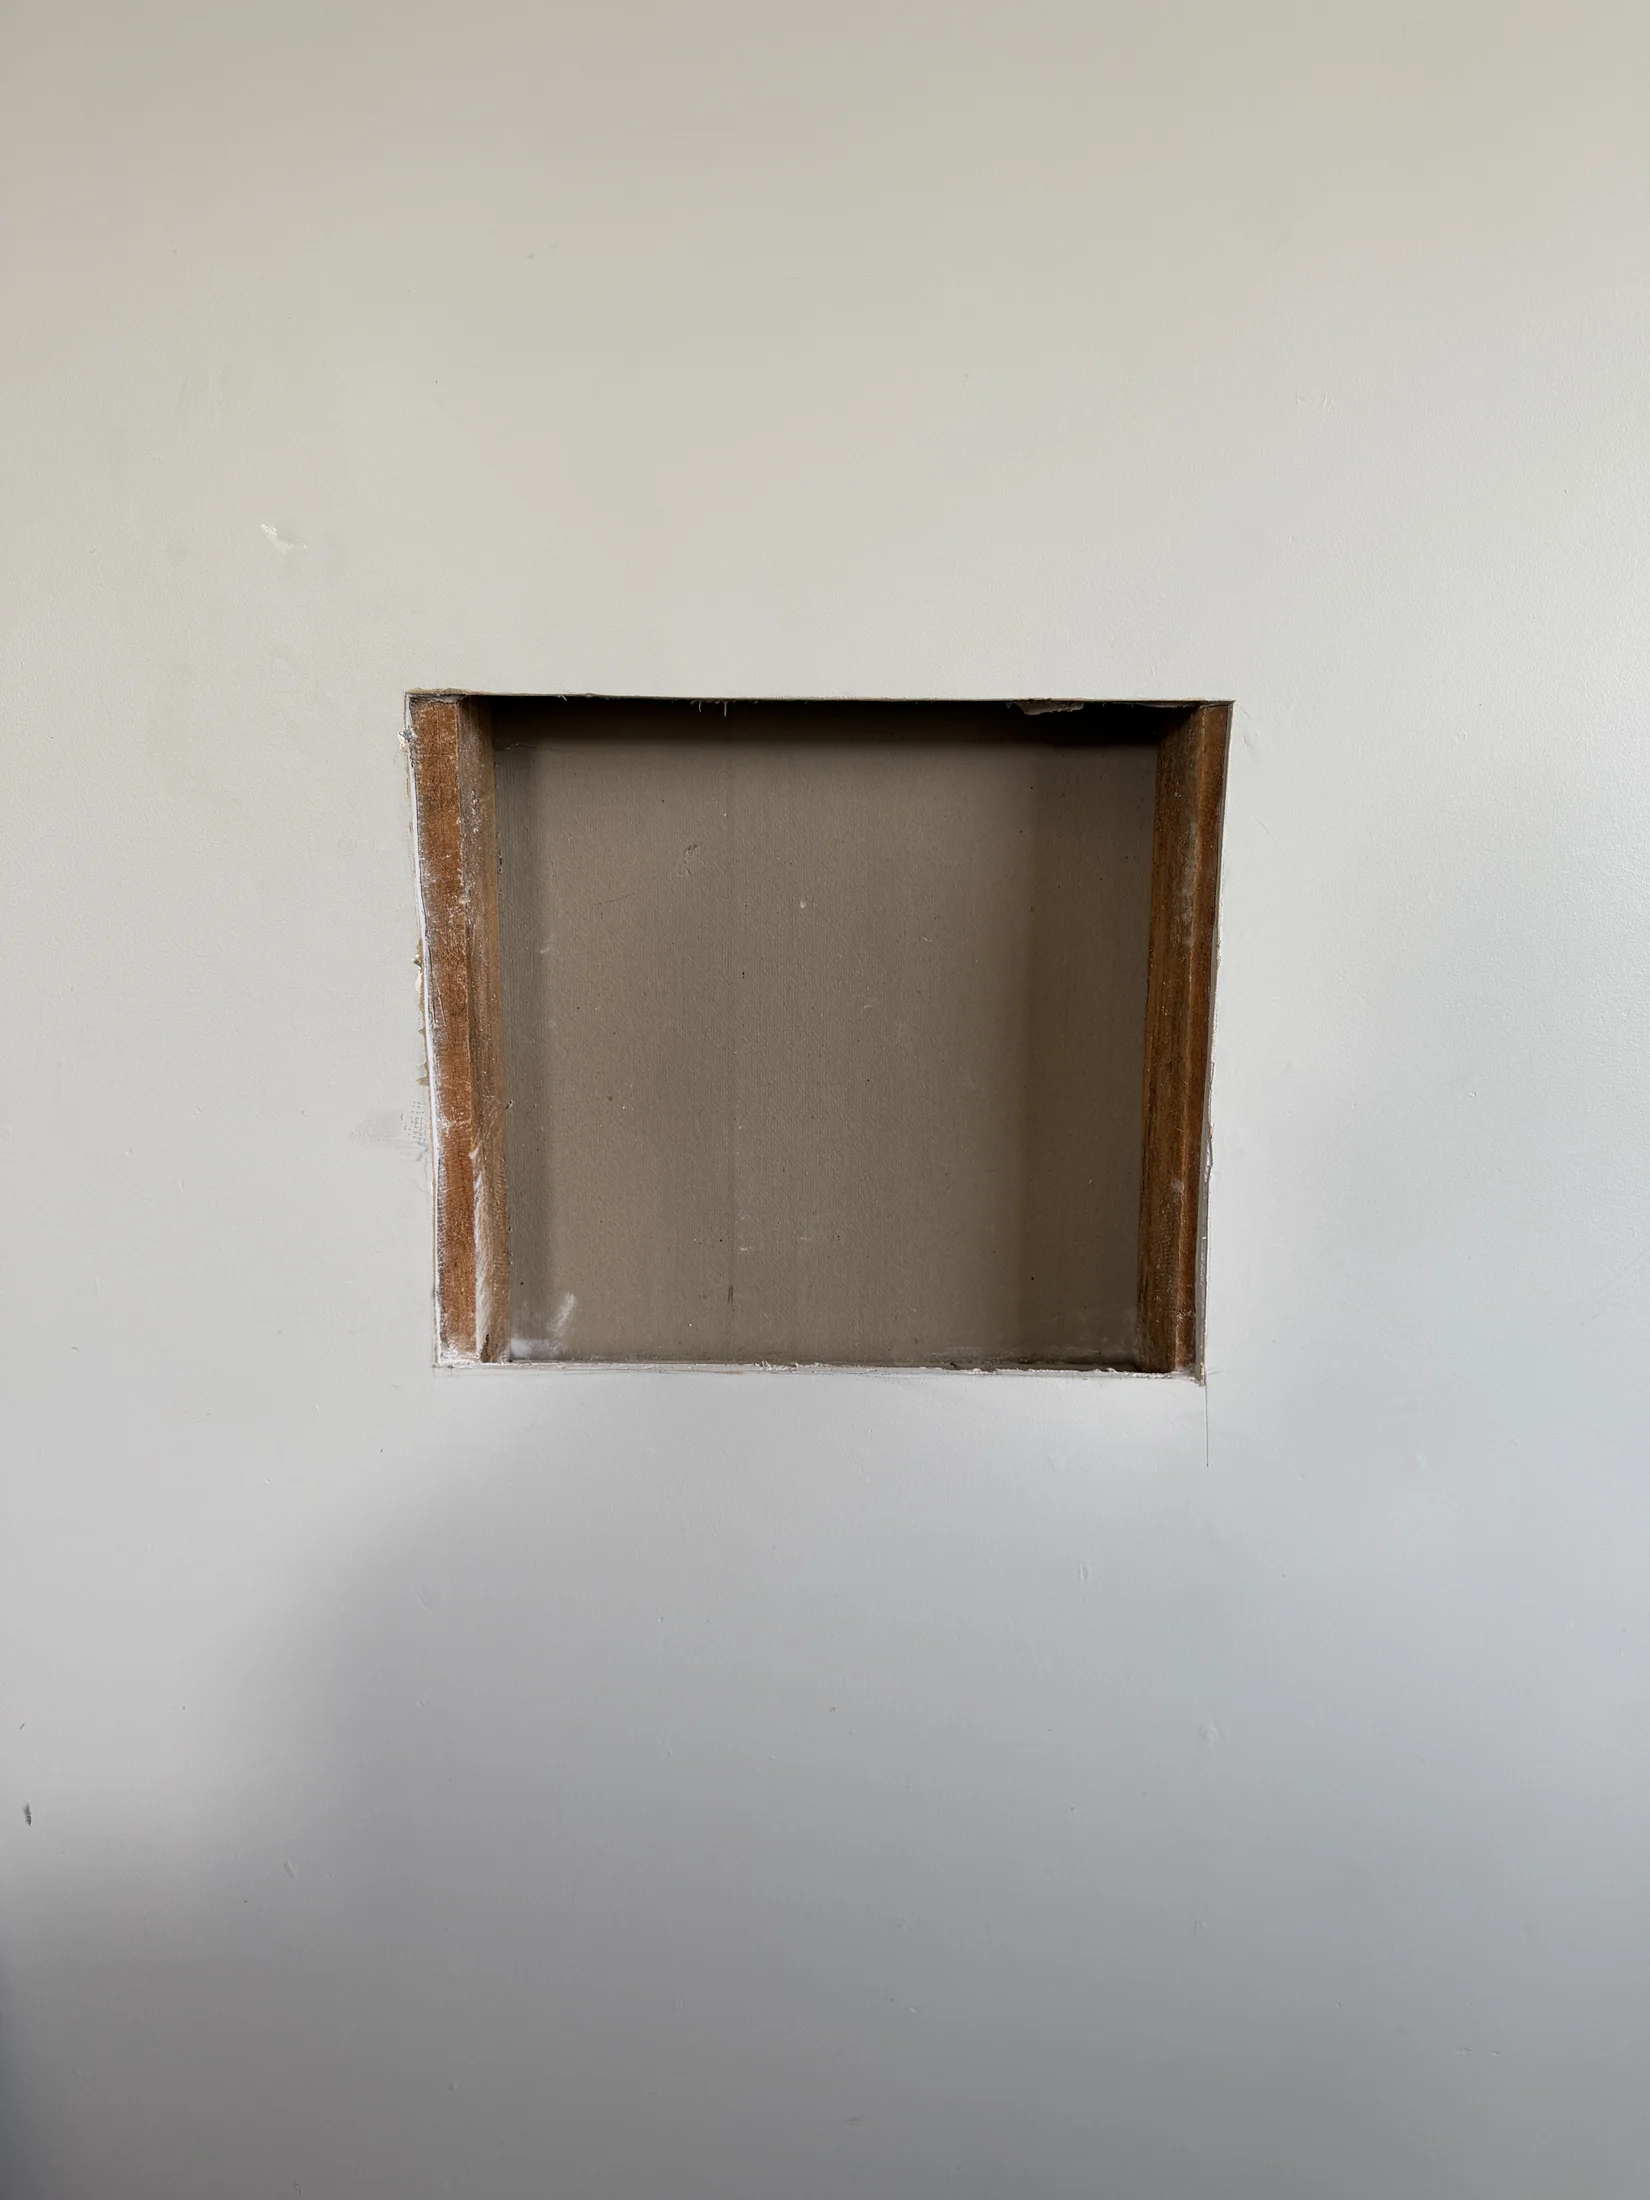
Strip back the old repair and cut the damaged area back to a clean rectangle using a utility knife or gib saw. Cut to where the plasterboard is solid — no cracked edges, no loose paper. If there's a stud behind part of the hole (like this job), you can screw your patch straight to it. Otherwise, slide a piece of timber behind the opening and screw through the existing gib on each side to create backing.
Step 2: Fit the New Gib
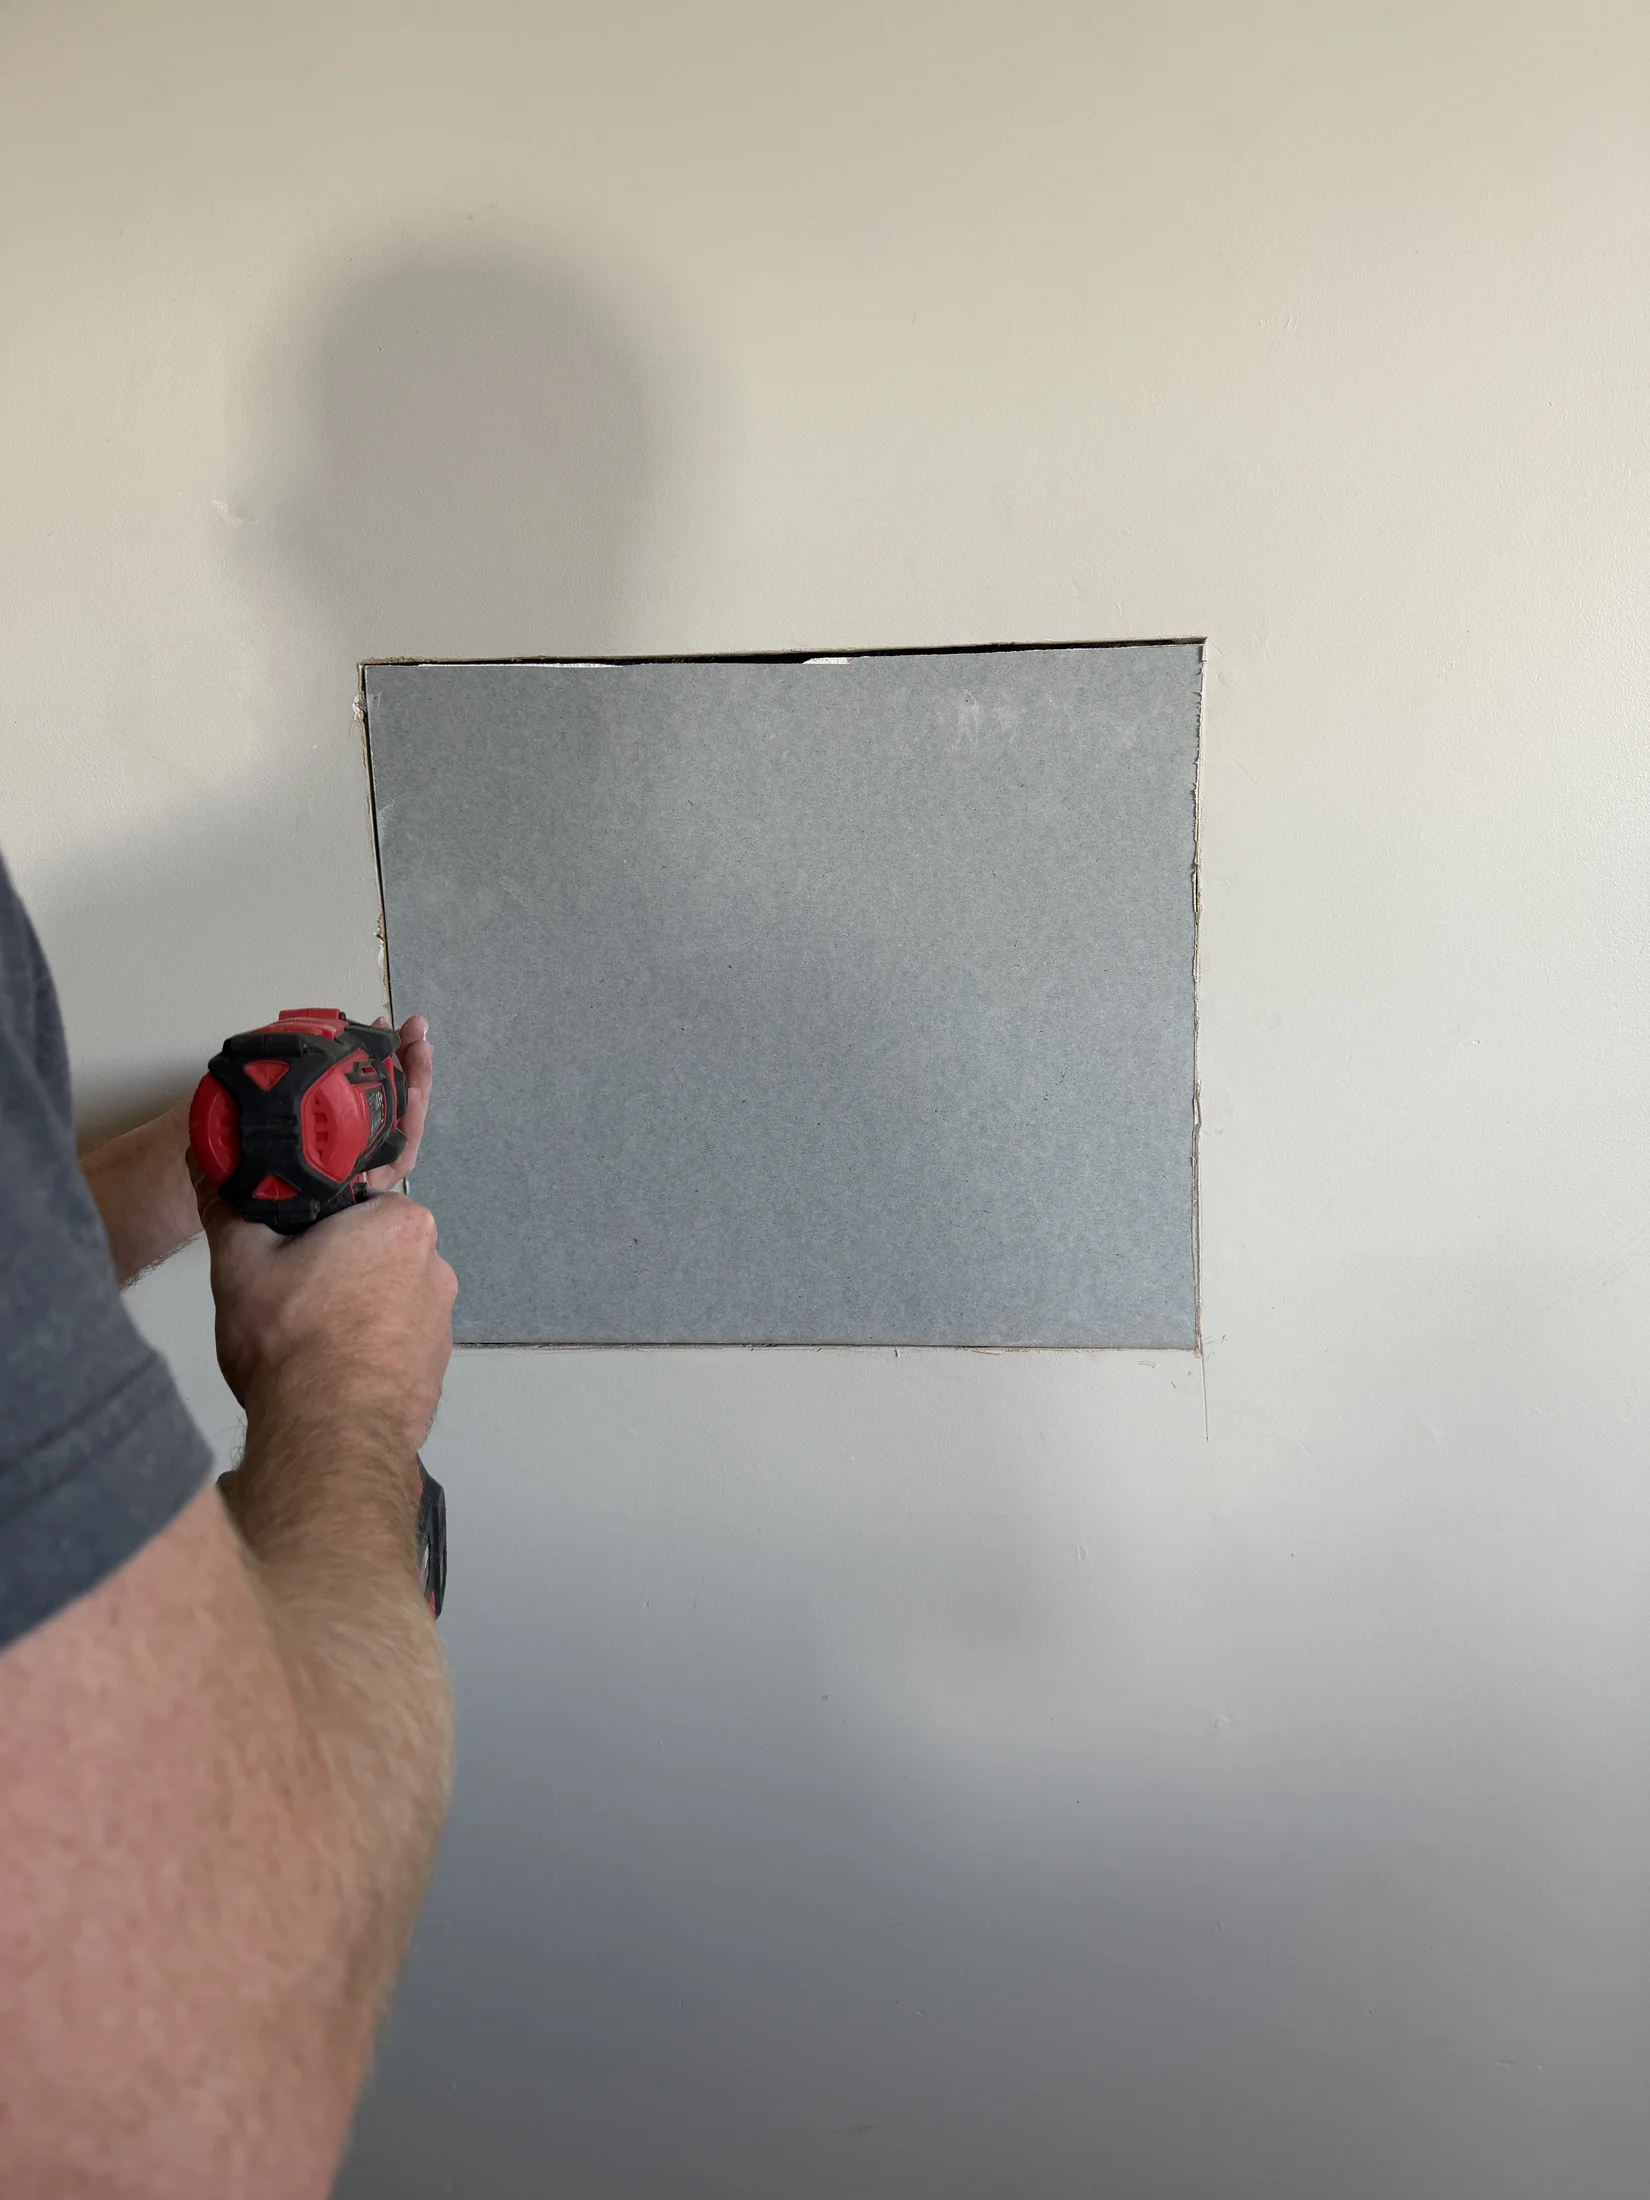
Cut your patch to fit with a 2-3mm gap around the edges — snug but not forced. Screw it to the studs or backing timber with gib screws, heads just below the surface without breaking through the paper face.
A tip from this job: most interior walls in Wanaka use 10mm gib board. It's easy to grab 13mm by mistake, but that's typically ceiling board. If your patch is thicker than the surrounding wall you'll never get it flush, so check before you buy.
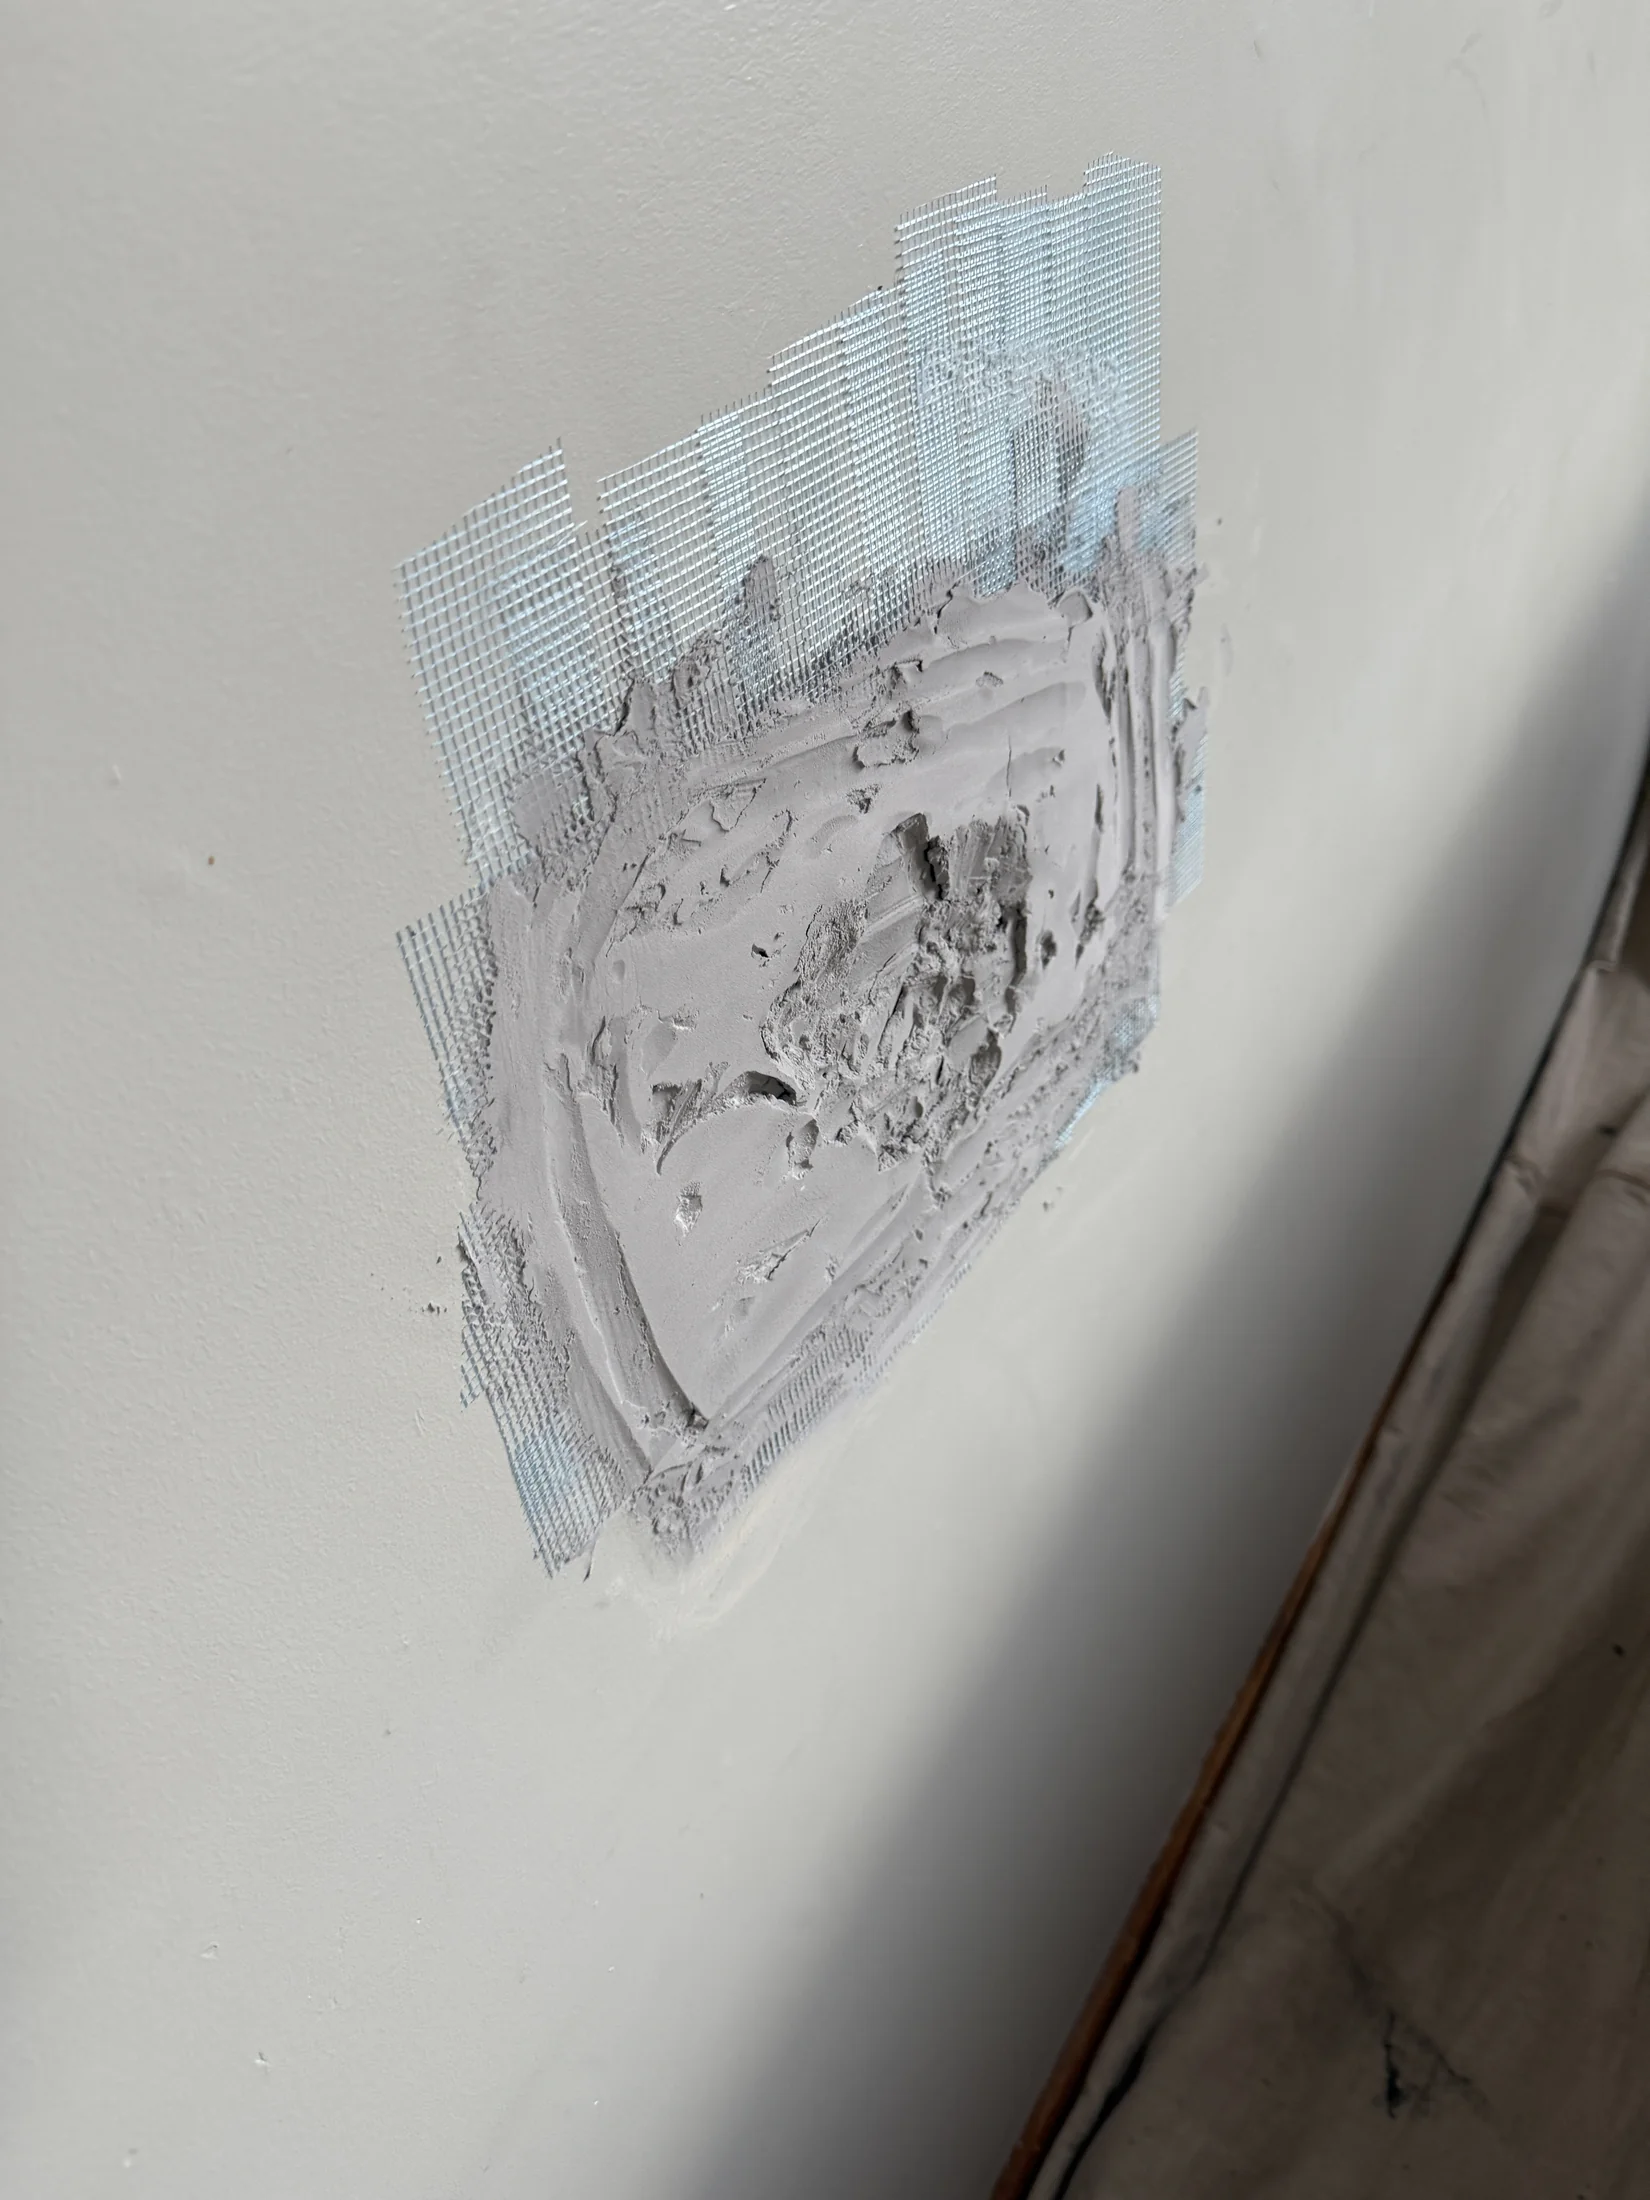
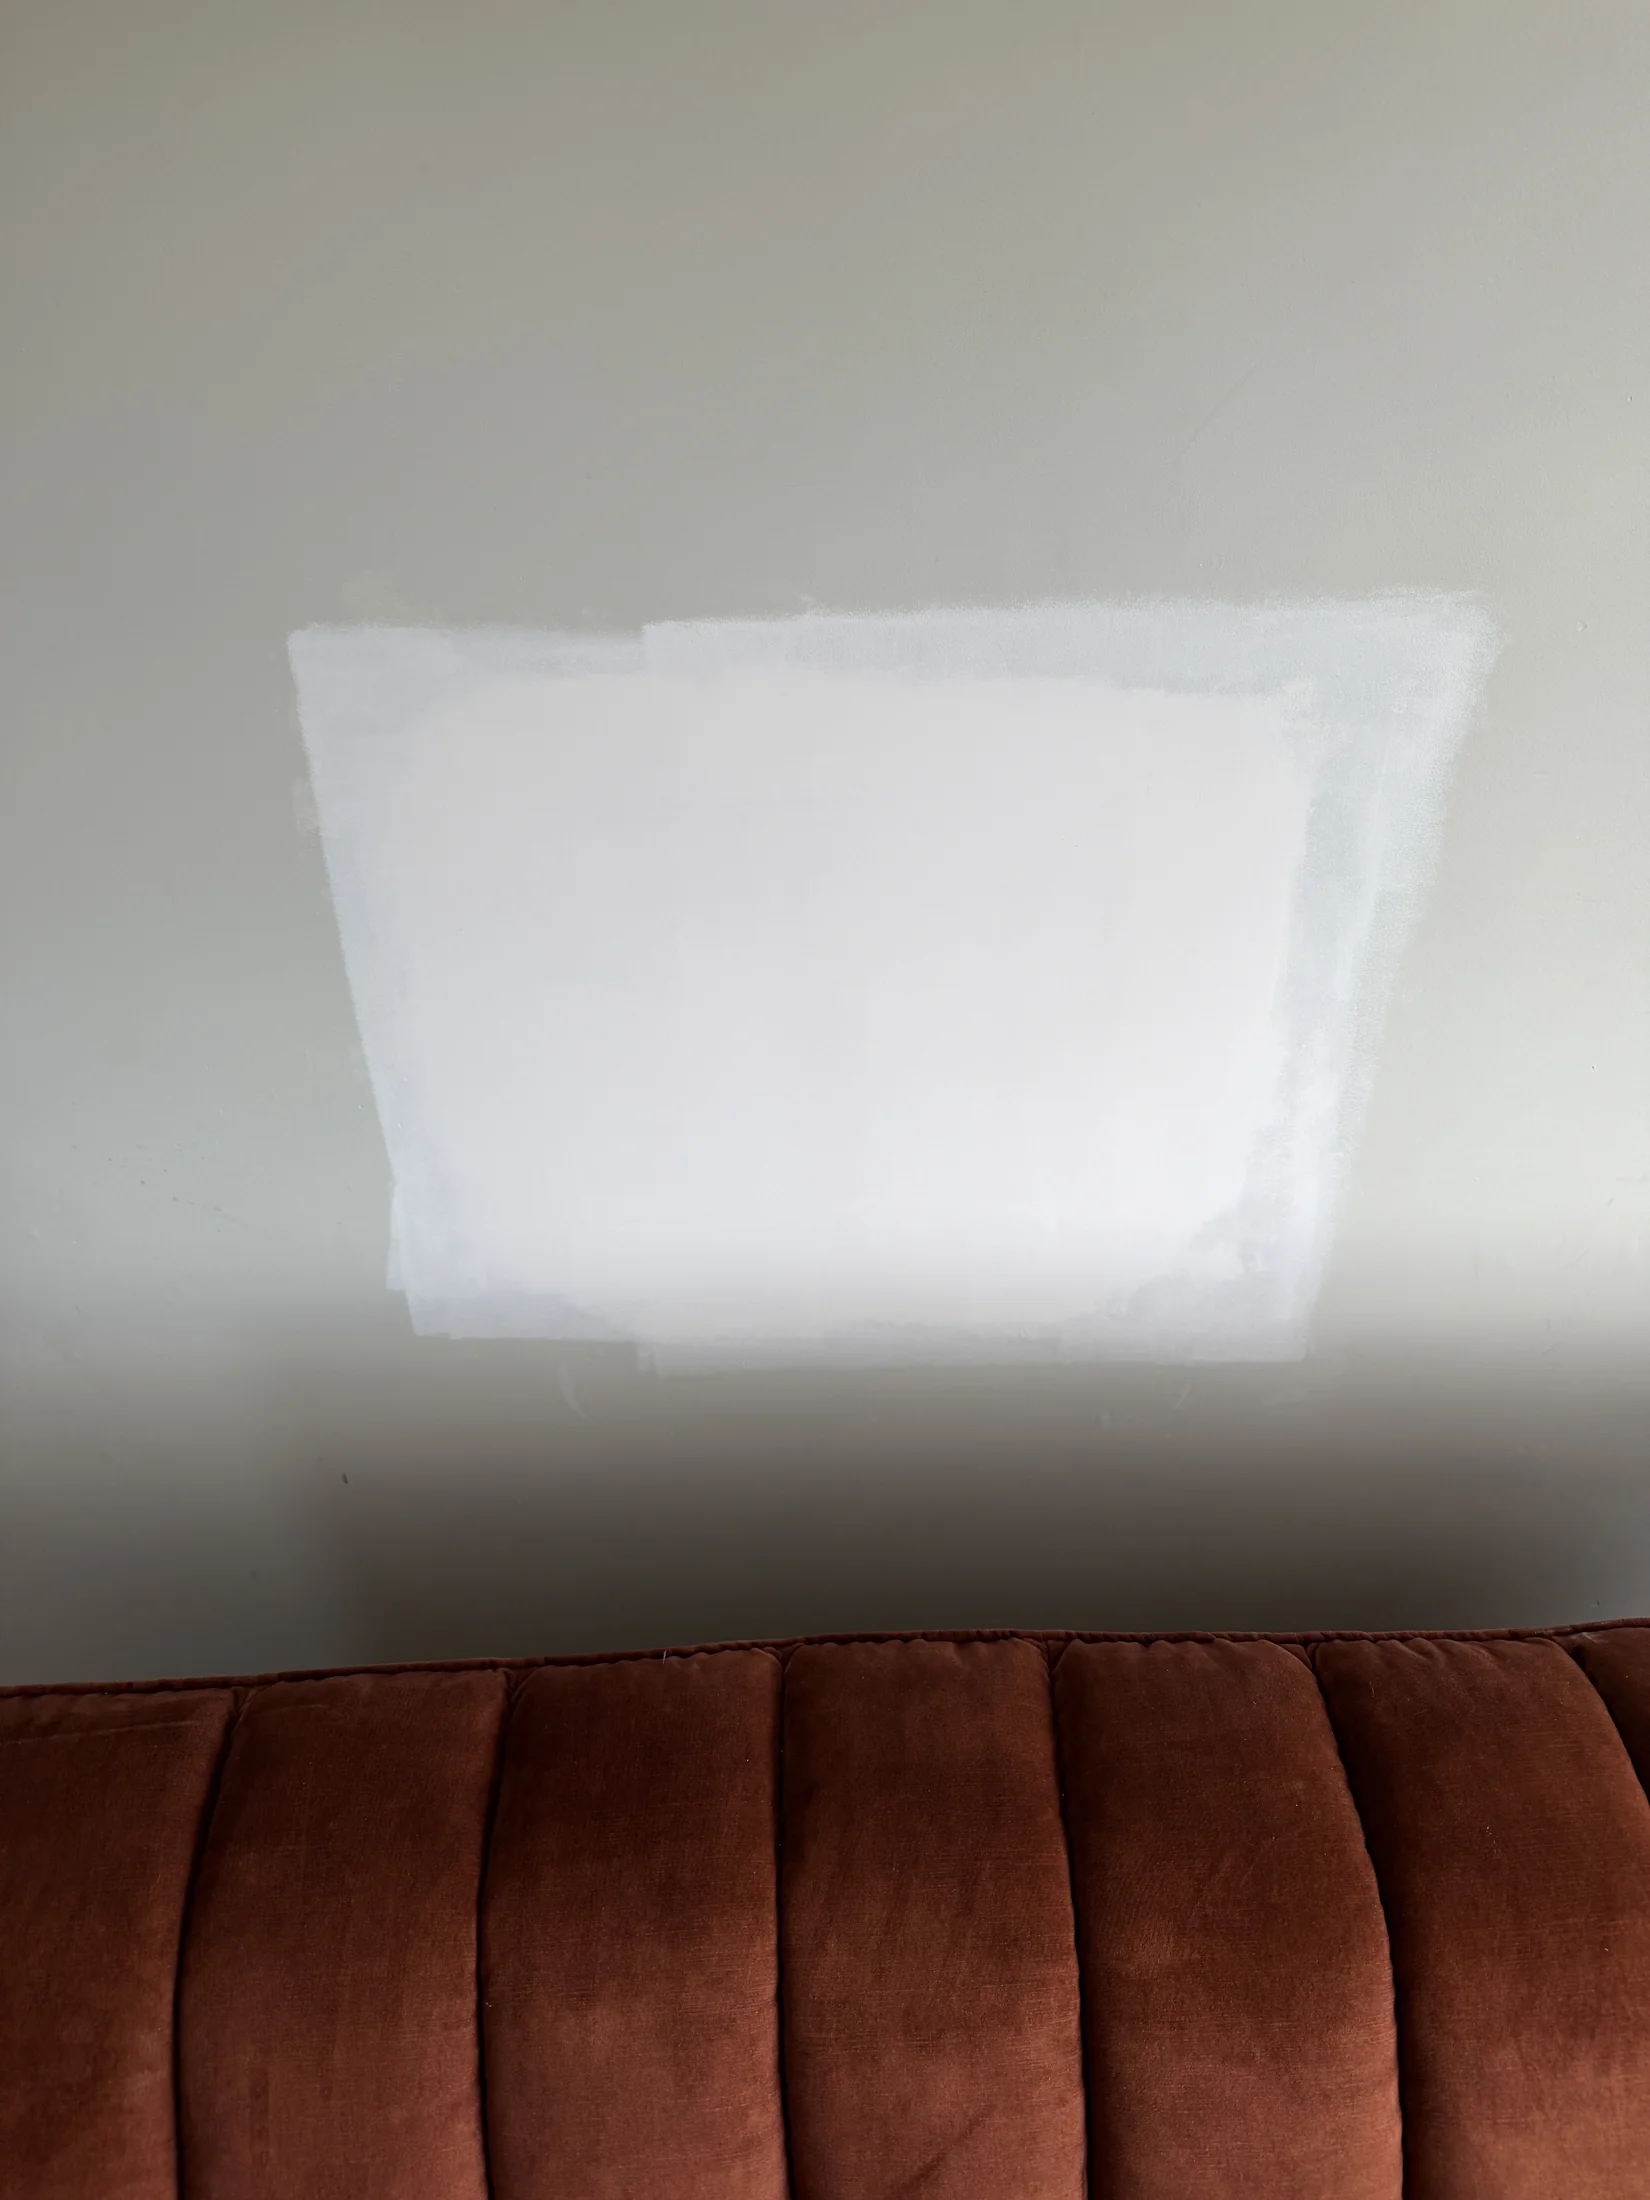
Step 3: Tape, Compound, Repeat
This step is where technique matters most. Apply self-adhesive fibreglass mesh tape over every join, then a thin first coat of compound with a broad knife. The key word is thin — you're just bedding the tape in, not finishing the job in one pass.
Let it dry overnight, then apply a second coat with a wider knife (200-300mm), feathering the edges out 200-250mm from the patch. The wider you feather, the more invisible the repair. A third coat may be needed for low spots. Sand lightly between coats with 120-grit on a block.
You can see here how wide we've spread the compound — that gradual transition is what makes it disappear.
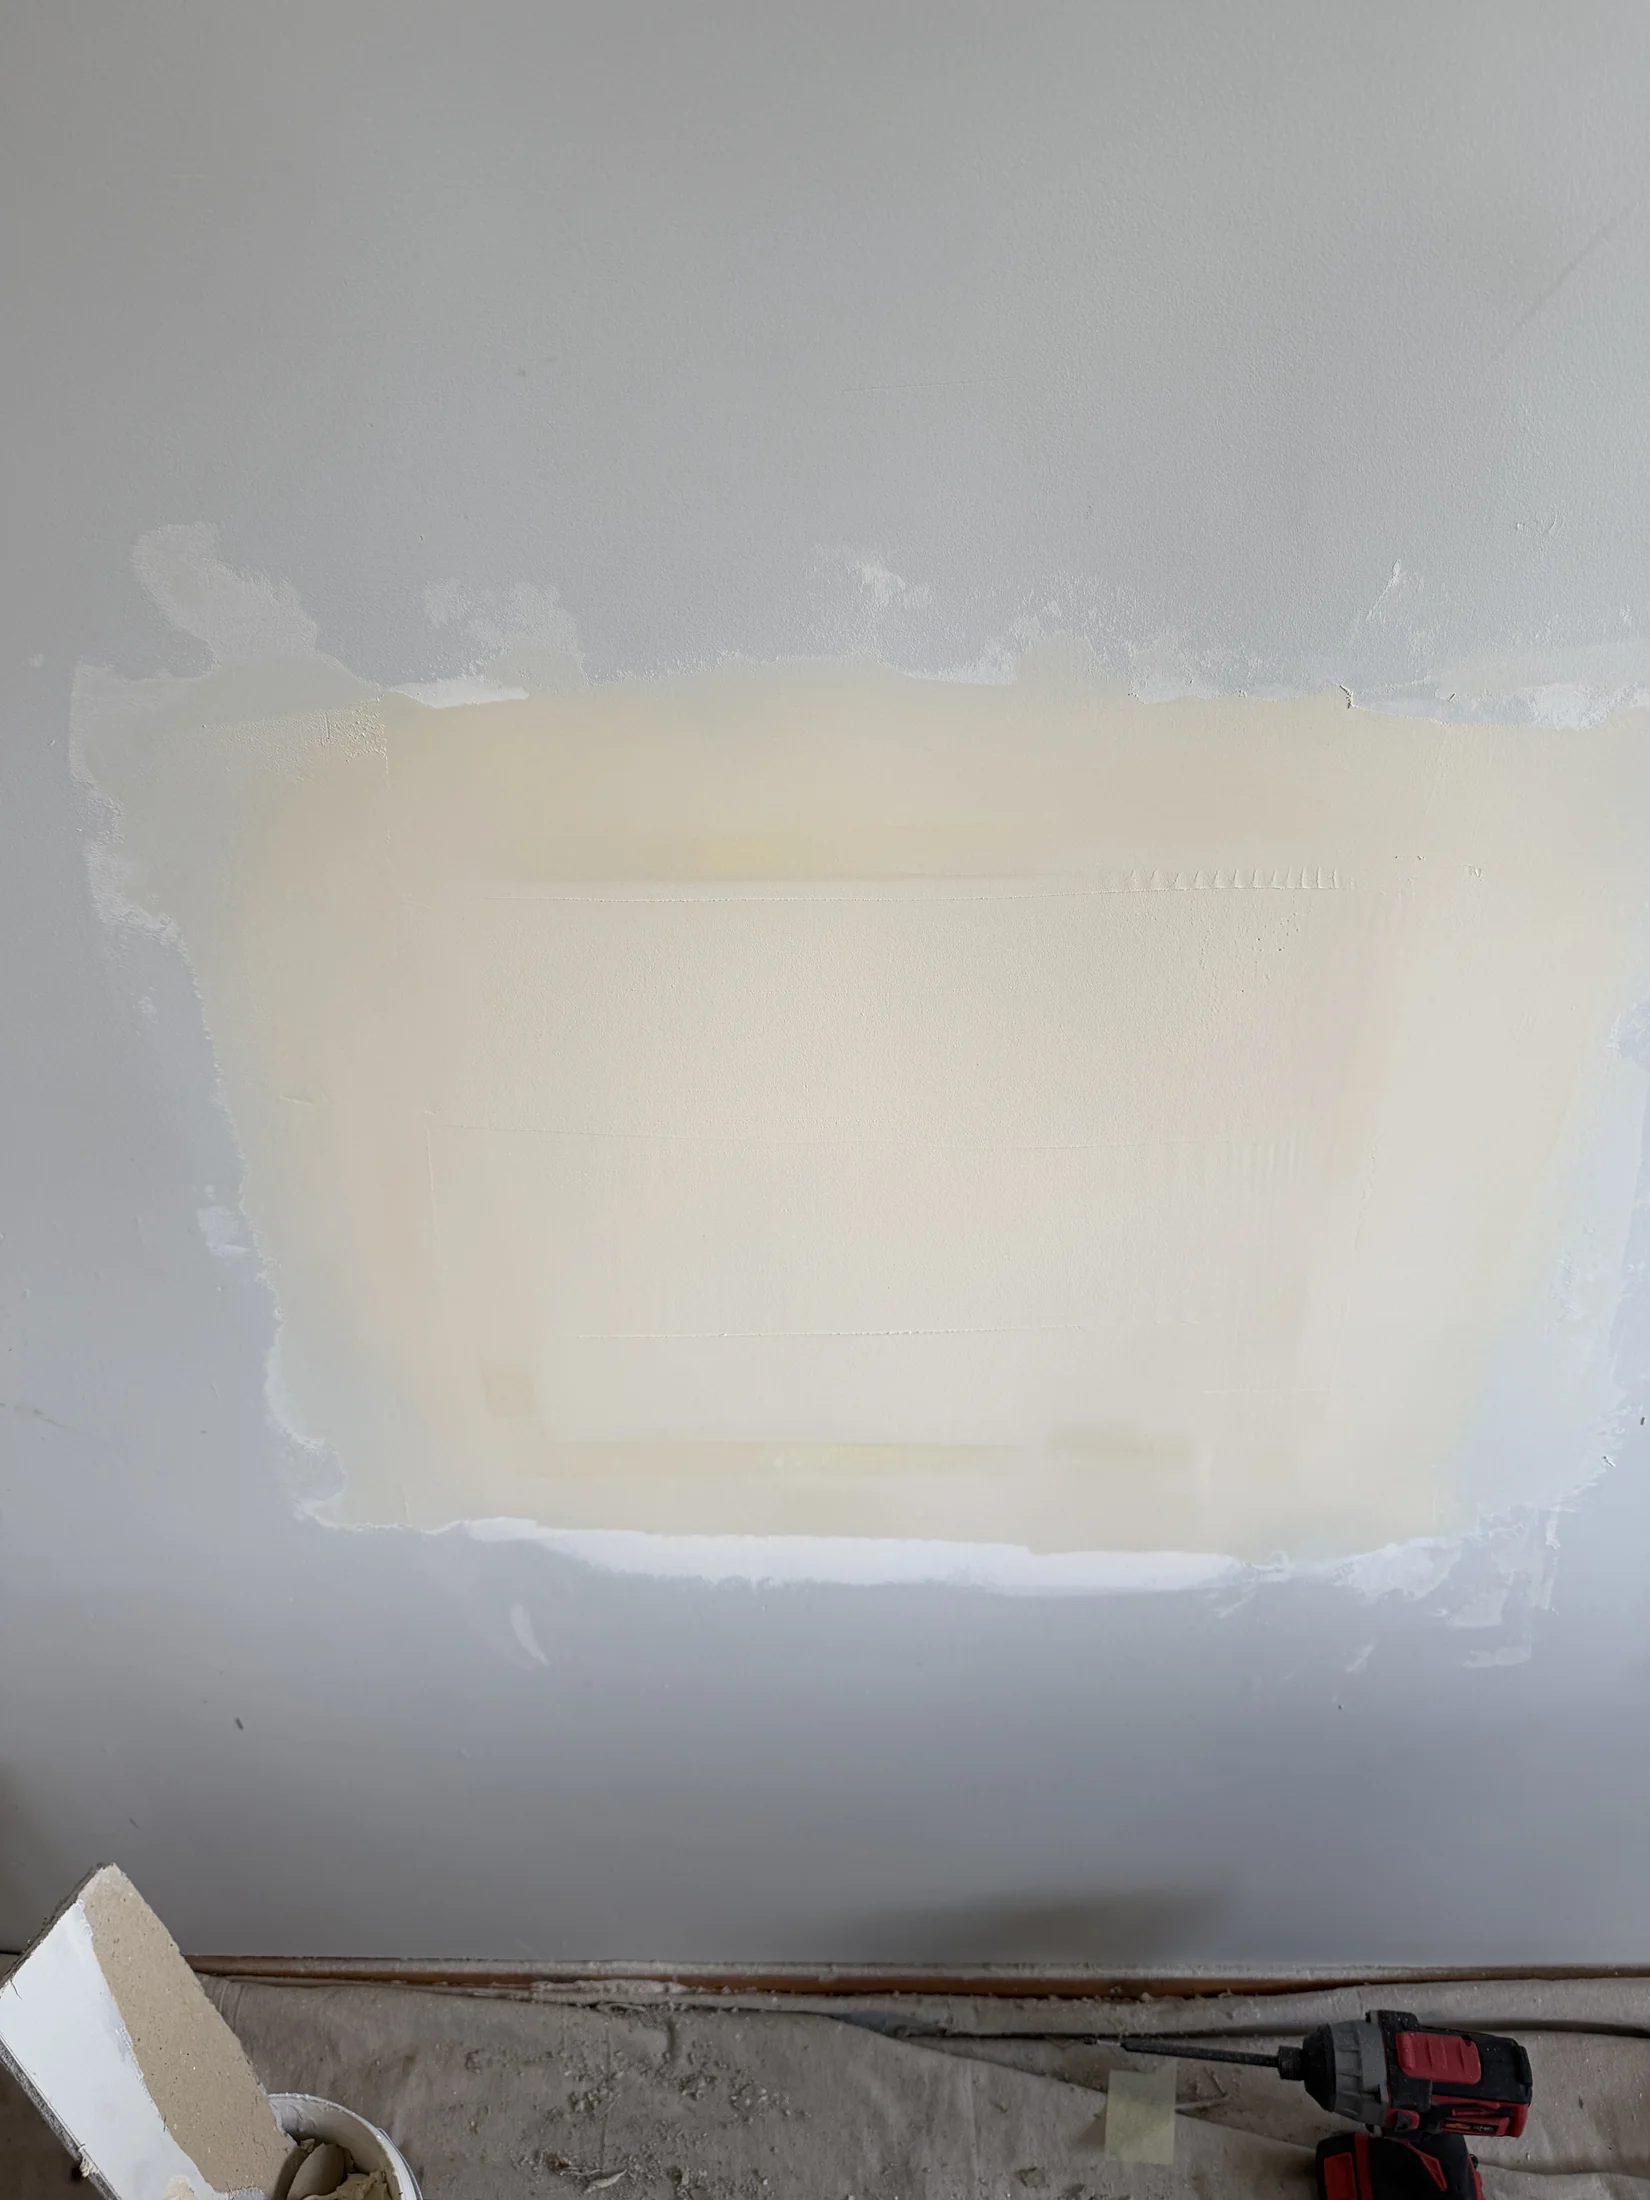
Step 4: Prime
Once the final coat is sanded smooth, wipe the dust off and apply primer/sealer over the patch and about 50mm beyond. Don't skip this — raw compound absorbs paint differently than the surrounding wall, and without primer you'll get a visible difference in sheen called "flashing." We use Zinsser 1-2-3 or Resene Seallock.
For this job we left it at primer — our mate was painting the wall himself. Even at this stage you can see the repair is basically invisible.
Step 5: Paint
Roll your matching colour over the primed area — ideally paint the full wall corner to corner so the finish is consistent. Two topcoats over primer and you're done. If you don't have the original paint, take a chip to Resene or Dulux and they'll colour-match it.
Common Mistakes
The three things that trip people up: applying compound too thick (it cracks and shrinks — multiple thin coats always win), not feathering wide enough (creates a visible hump), and skipping primer (the patch glows through the topcoat). Get those three right and you're most of the way there.
When to Call a Pro
Holes up to 200mm are very DIY-friendly if you're patient. For anything bigger, across multiple sheets, or where you need a guaranteed invisible finish, give us a shout. We do wall repairs all the time across Wanaka, Luggate, Cromwell, and Queenstown — happy to help.